A Case Study Convo: After 130 Years, A Fresh Start for an SF Victorian
Aug 21
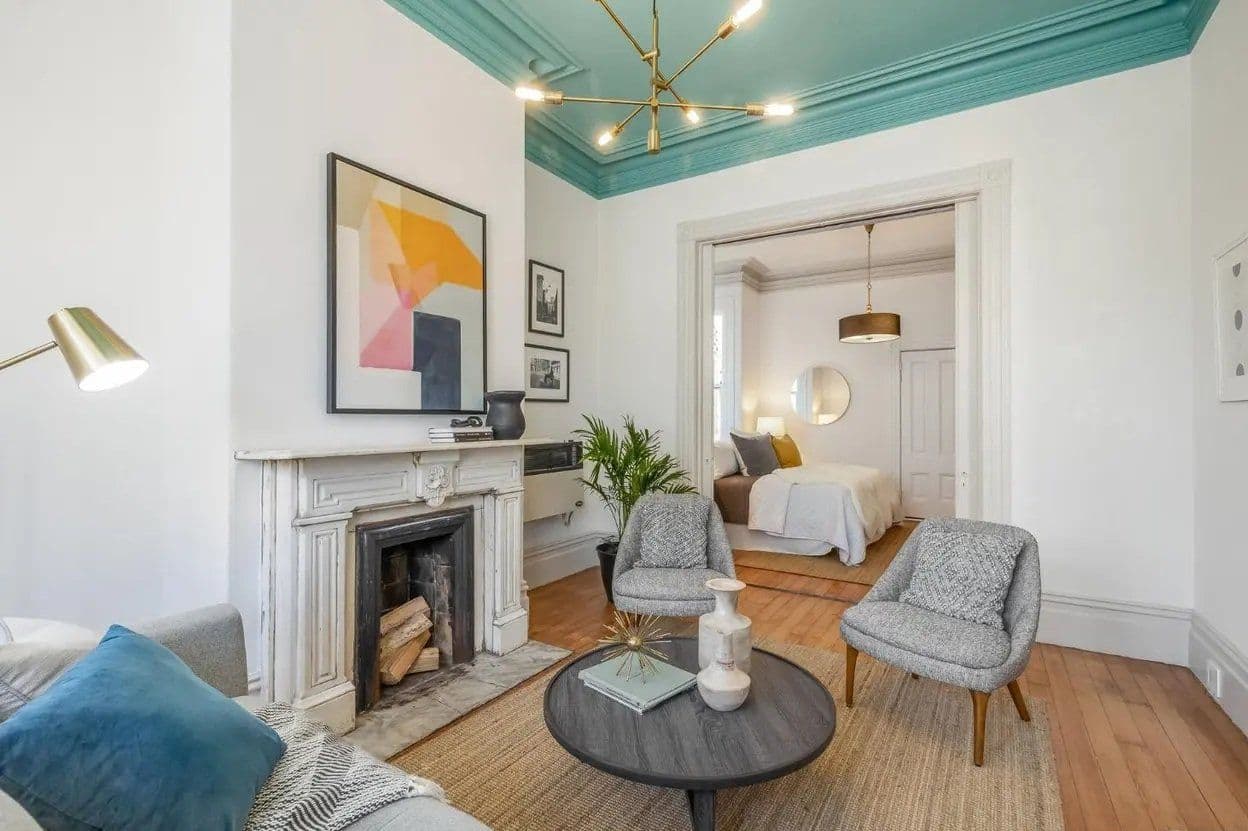
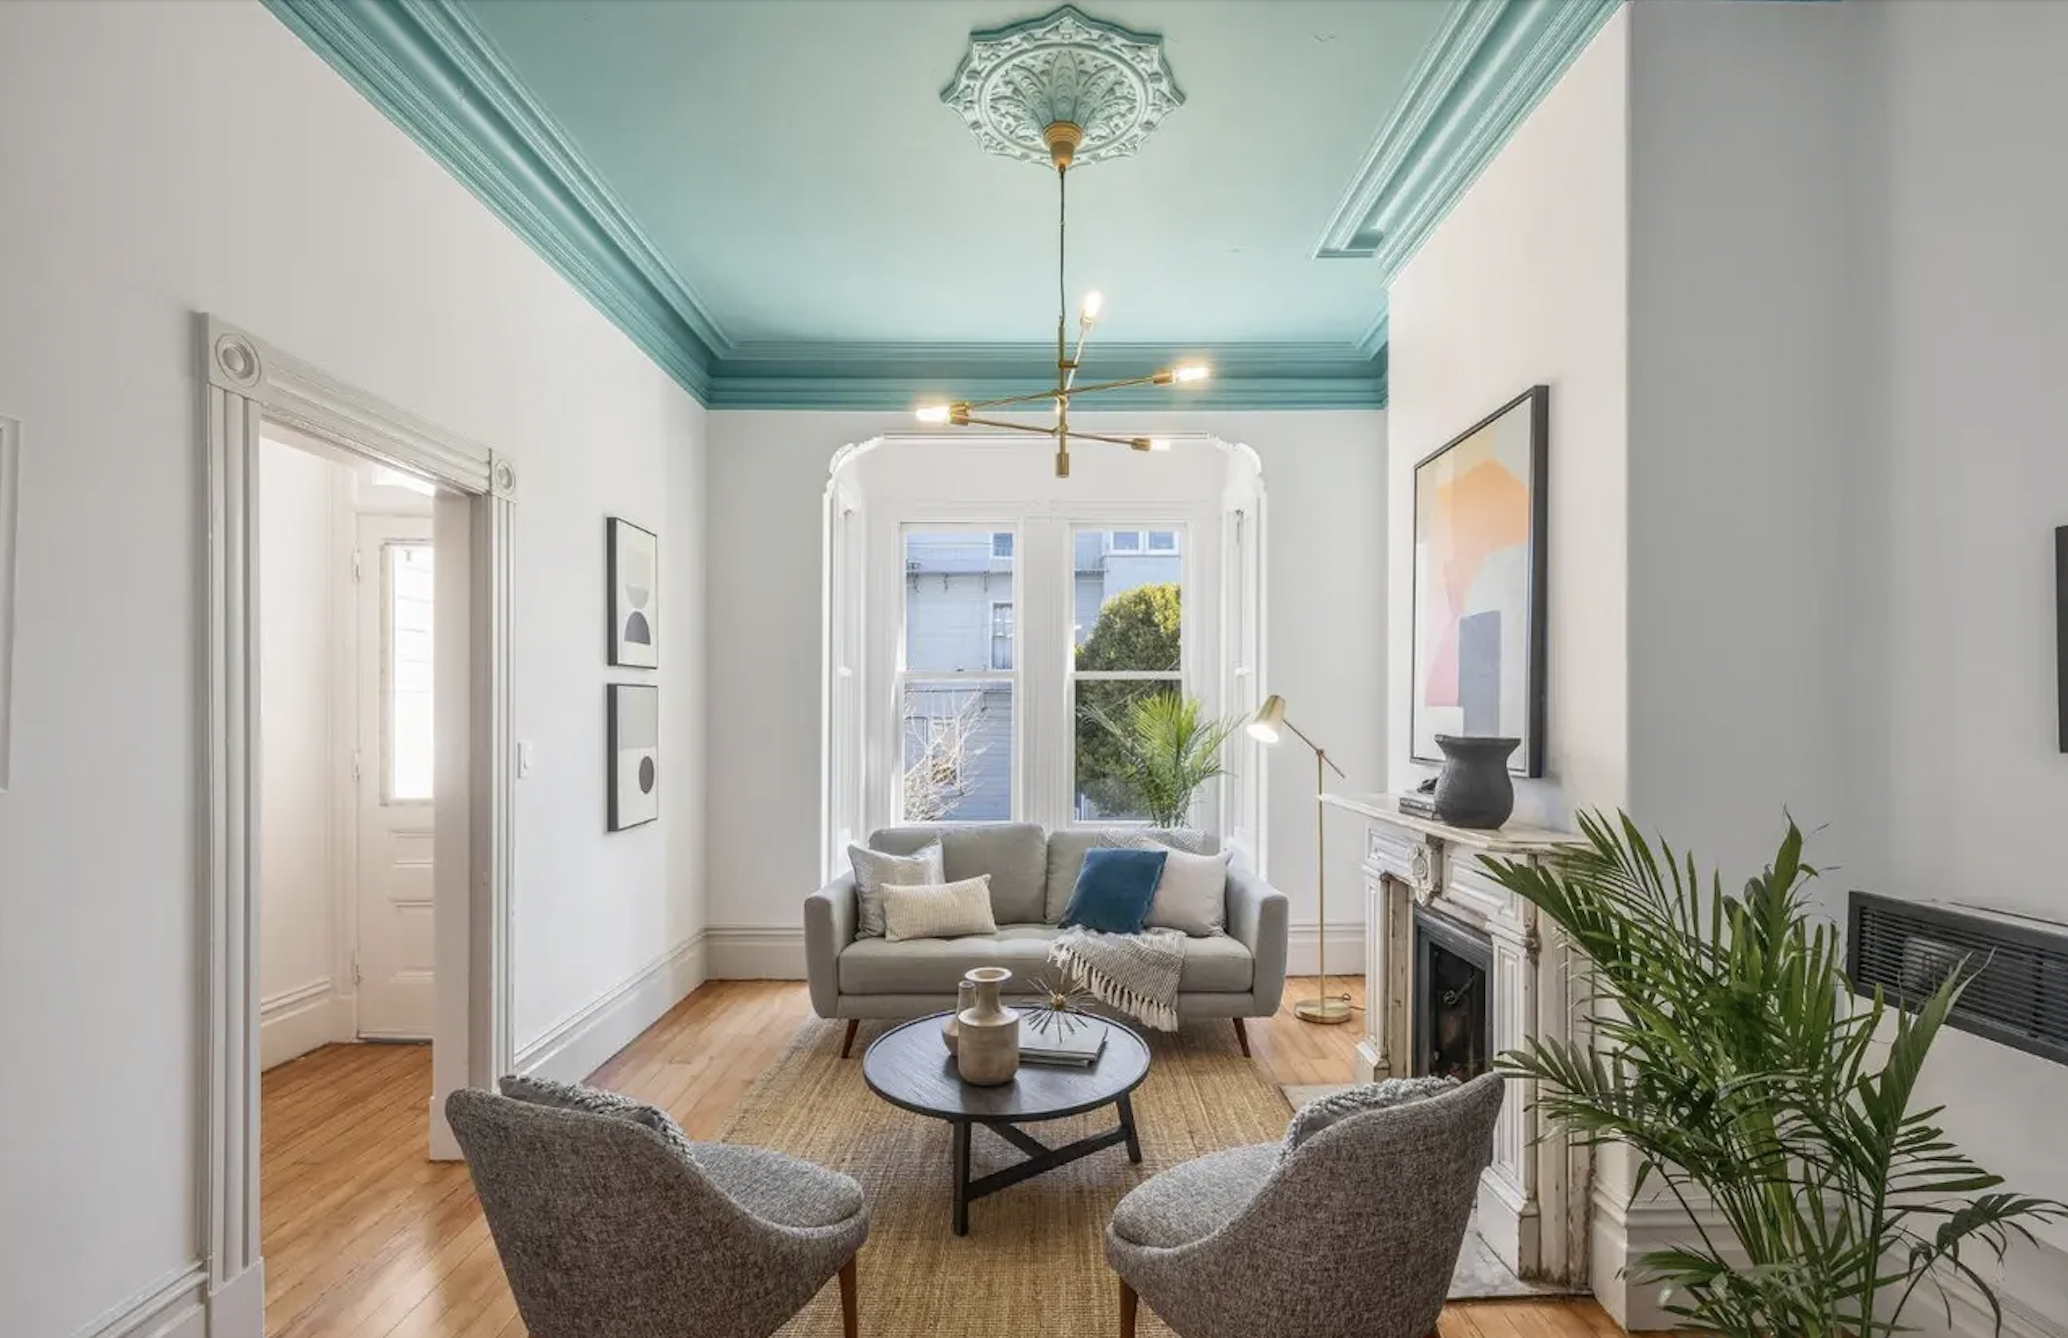
At Freemodel, we were thrilled when our project director Joelle Belmonte was featured in a high-profile blog post on Apartment Therapy. It was such a fascinating project that I was curious to dig deeper with Joelle to better understand the work that was done throughout Freemodel’s Victorian duplex project in San Francisco. This 5 bedroom, 3 bathroom duplex in the buzzing North of the Panhandle neighborhood in San Francisco was built in 1892 and had weathered many decades of renter wear, altering its character and diminishing its natural charm. Coming in at approximately 2,500 square feet, the upper flat offers 3 bedrooms, 2 bathrooms, while the lower unit has 2 bedrooms and 1 full bathroom. Both units feature hardwood floors, spacious living rooms, cozy fireplaces, and ornate wood cabinets. The sellers knew that, with the right renovations, this beautiful property could fetch top dollar. That's our specialty at Freemodel, and that's how talented Joelle came to be involved.
One classic signature of San Francisco apartments is the pocket door that connects living rooms to dining rooms. These were designed for an easy transition between rooms, while giving the option to close off a space temporarily. They are often on rollers and have beautiful wood paneling. This home features pocket doors, and it was up to Joelle to decide how to best utilize the transition from the living room to the dining room. Under her direction, the dining room in this project was transformed into a bedroom, and I wanted to better understand her planning process and decision-making:
So how did you first get involved with this project?
An agent that I work with quite often, Eddie O’Sullivan, got ahold of this listing and suggested the sellers bring me in to help restore and modernize this duplex while still paying homage to the home’s deep, rich history. Ultimately, our goal when renovating this duplex was to appeal to modern buyers and continue to keep the charm of the NoPa neighborhood.
Can you tell me a bit about this home before we get focused on the dining room? What state was it in when you first walked through?
This home was rented out from tenant to tenant for over 30 years and the renter modifications were really taking a toll on the place, from bad paint jobs to holes left in the wall to dings in the molding and flooring. It was last updated around three decades ago. The home was built in 1892 and electrical was still original from its inception in the 1920s. We set out to peel off the layers of renter design and start fresh!
Can you talk about your decision to turn the dining room into a bedroom?
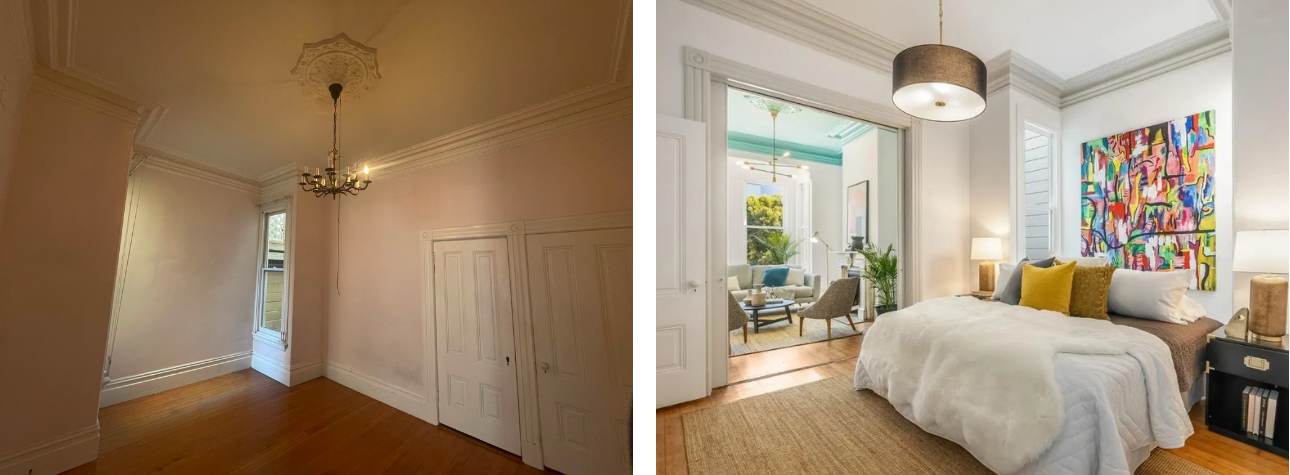
The dining room, which sits just off the main living room, was a light pink color which did not flow well with the rest of the home. It felt old and stuffy. When looking at the floor plan and how we could maximize space, we decided that the kitchen was actually big enough to serve as an entire dining space as well. So we opted to turn the original dining room into a 3rd bedroom. It made for a good bedroom because there was already a closet built into it and a door that leads back out to the hallway. The original pocket doors that connect this room back to the living room can be opened and closed, or permanently sealed to create a new room if the new owner were to choose.
From the photos, it looks like you decided to replace the original chandelier. How and why was this done?
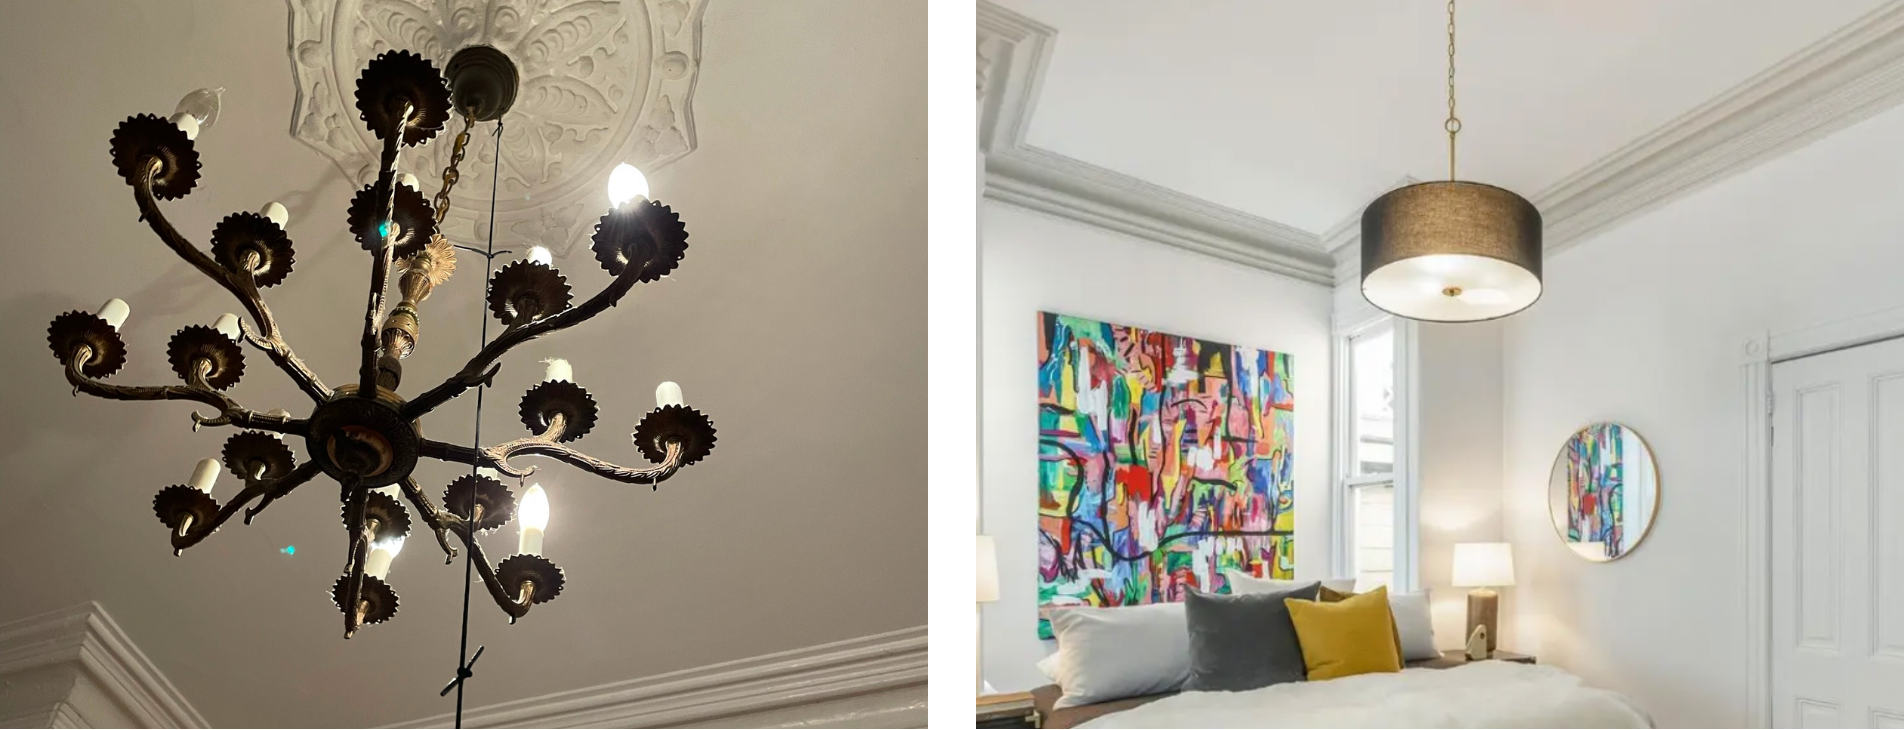
This dining room-turned-bedroom originally had an old chandelier on a pulley which we wanted to replace, and the whole room definitely needed a fresh coat of paint. It would have been around $2-3K to re-wire that chandelier to pass current electrical (mainly the plaster would have needed to be opened up, which can crack and cost a lot in repairs) so we opted to put in a remote control lightswitch that runs off batteries and doesn’t require working internet or new electrical. This was a $30 solution to a fix that could’ve cost much more, and helped to enhance this room’s natural beauty while making it look current and fresh.

Apart from the dining room makeover, what are your top three highlights from this remarkable project?
One of the most important steps was definitely making sure that all of the plaster was structurally sound while making it look its best without having to redo it. Plaster is very difficult to make repairs to and requires a specialist that can be very expensive, so we opted to paint over some cracks while ensuring that all the walls were still safe.
Secondly, we loved how beautiful the original Douglas Fir flooring that spans throughout the home was and discovered that it had a beautiful, natural look after sanding. So we opted to keep the natural wood finish with no additional staining and that made a big difference.
A third step and big piece of advice to other designers is to keep all of the hardware that you find or take off and hang onto them until the end of the project. You never know what you’re going to need and might add some elements back in order to keep the original detail. We reused the chandelier canopies and spray painted them gold to give them a fresh finish. It was a real honor restoring a grand old lady to her former beauty!